SipCube — How to Use
How to Use SipCube
First set up your SipCube S1, then learn the app — reading your daily ring, logging a drink, pairing your device, and tracking your streak.
Part 1
Set up your SipCube
Get the device charged, powered on, and tracking in your bottle.
SET UP
Six steps to get tracking
A quick overview — for the full walkthrough with every detail, see the complete setup guide.
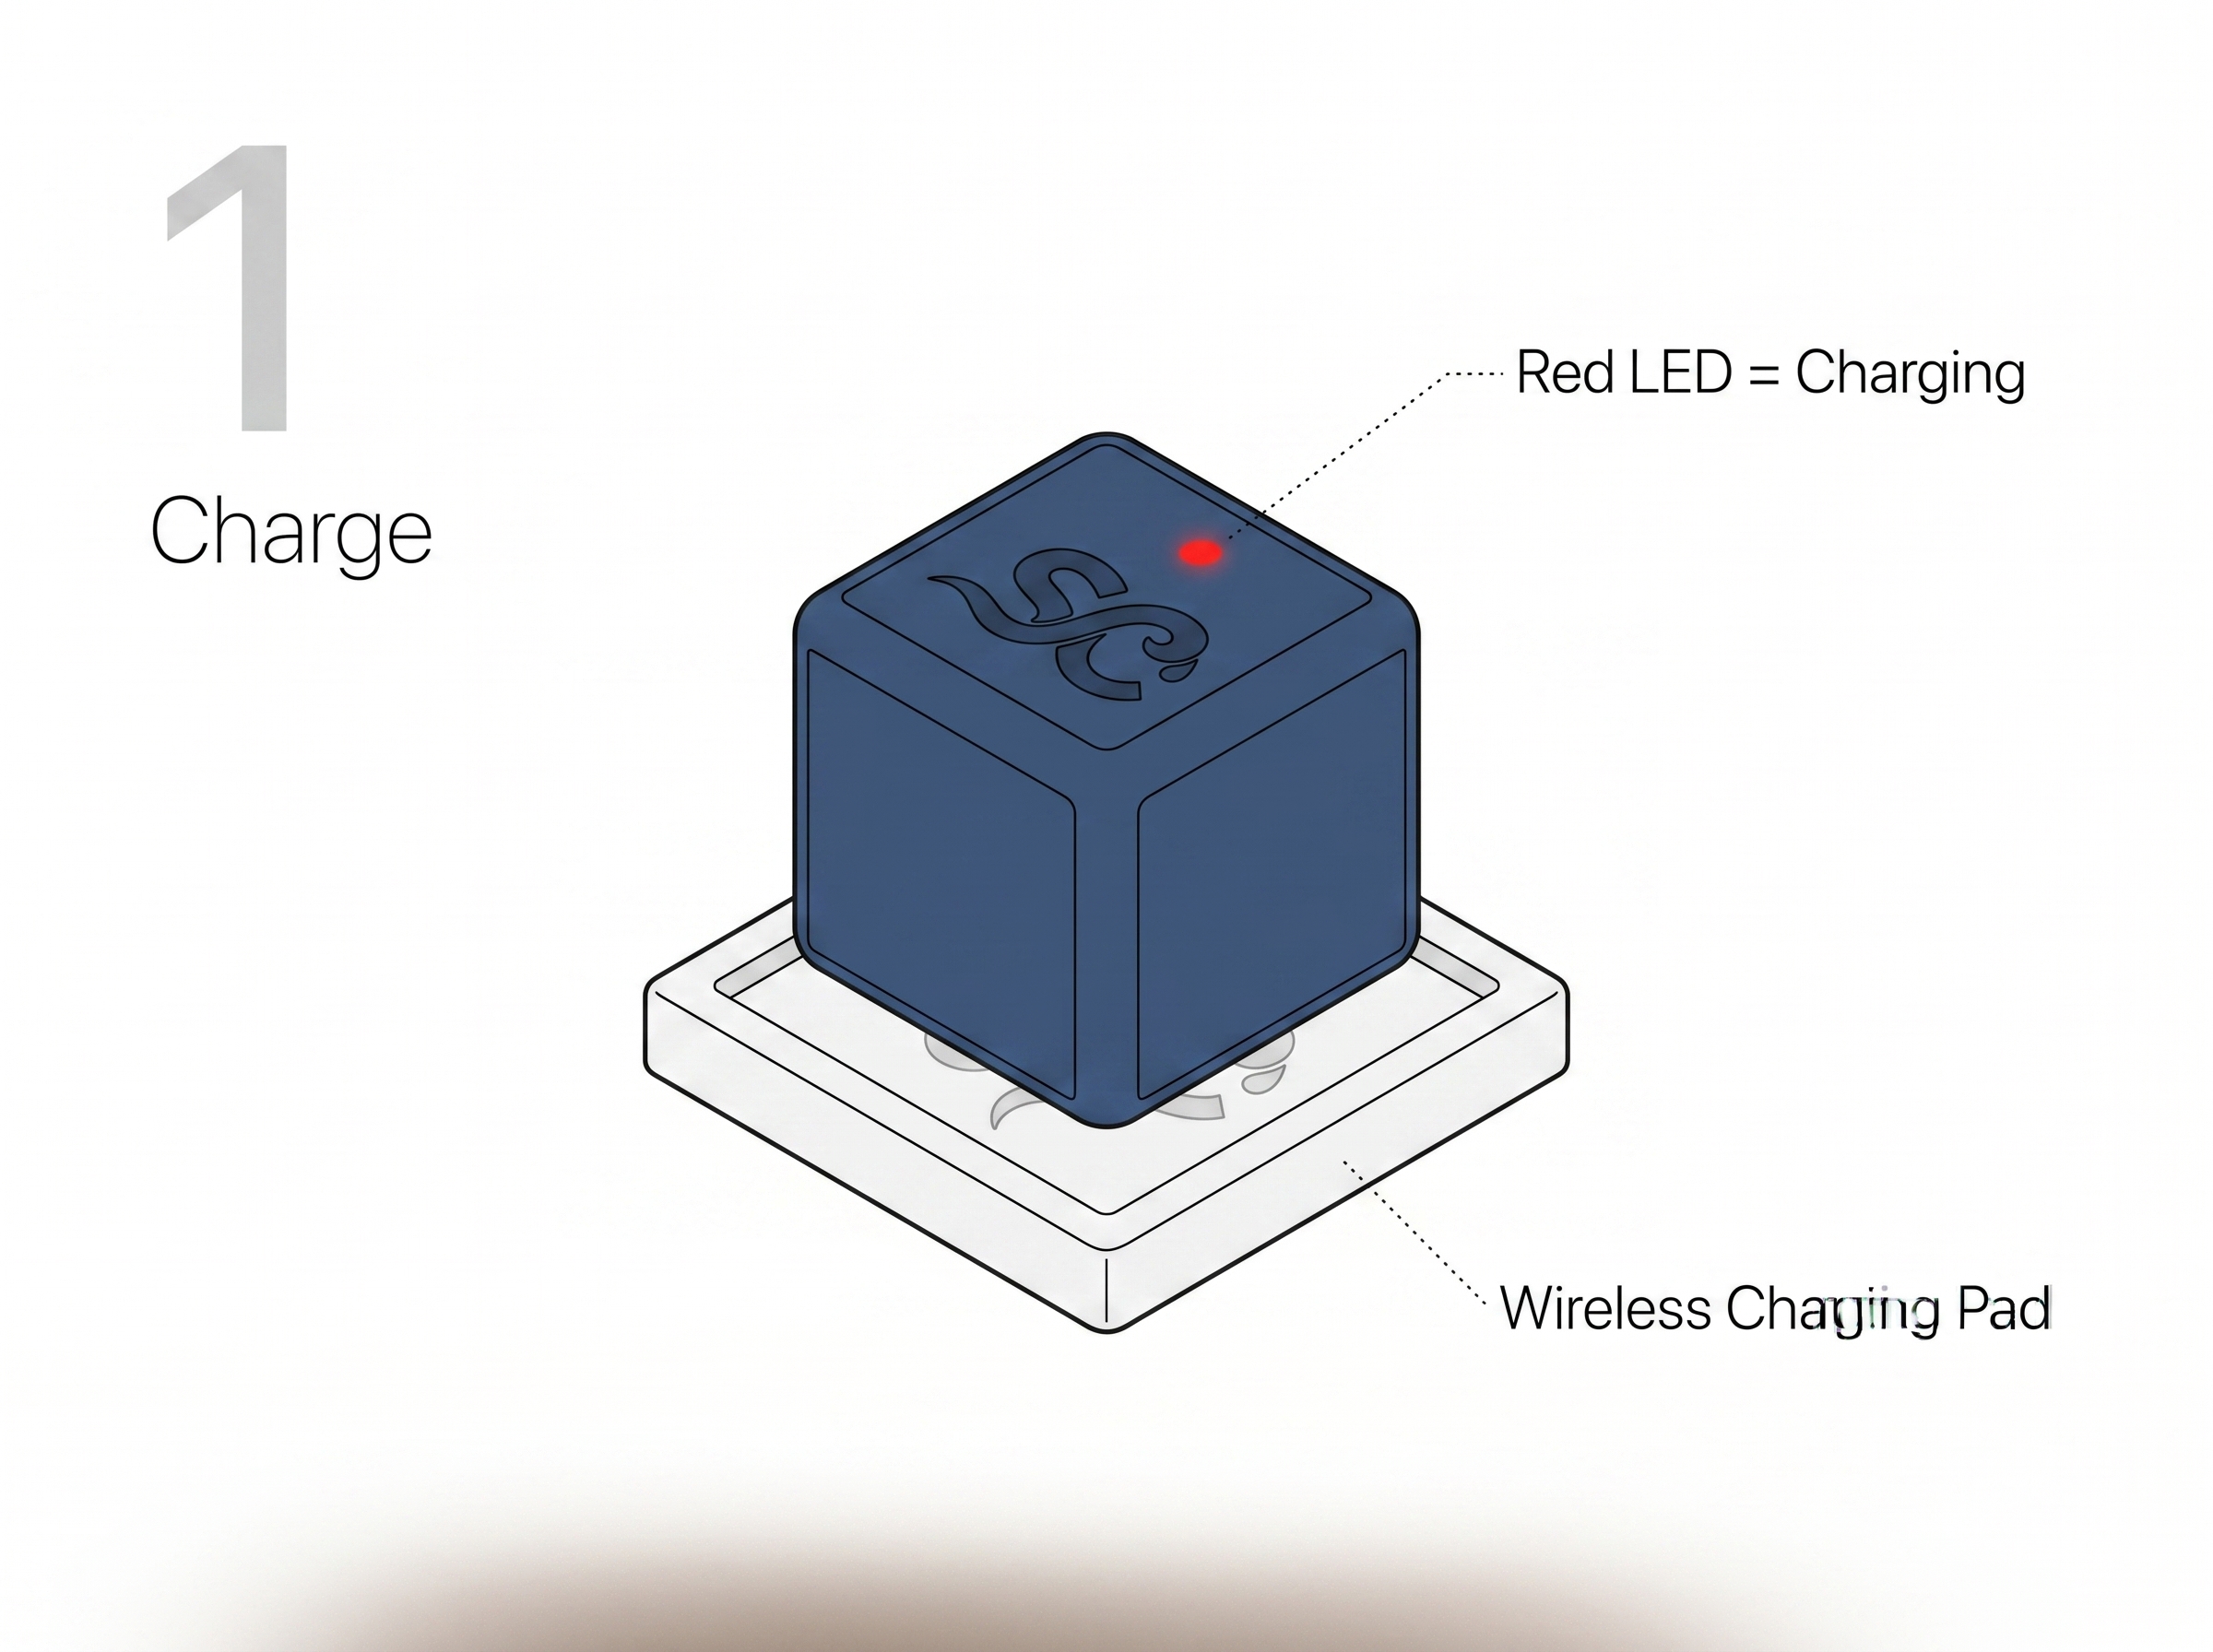
- Charge — place SipCube on the wireless pad for at least 2 hours. Red LED means charging; it turns off when full.
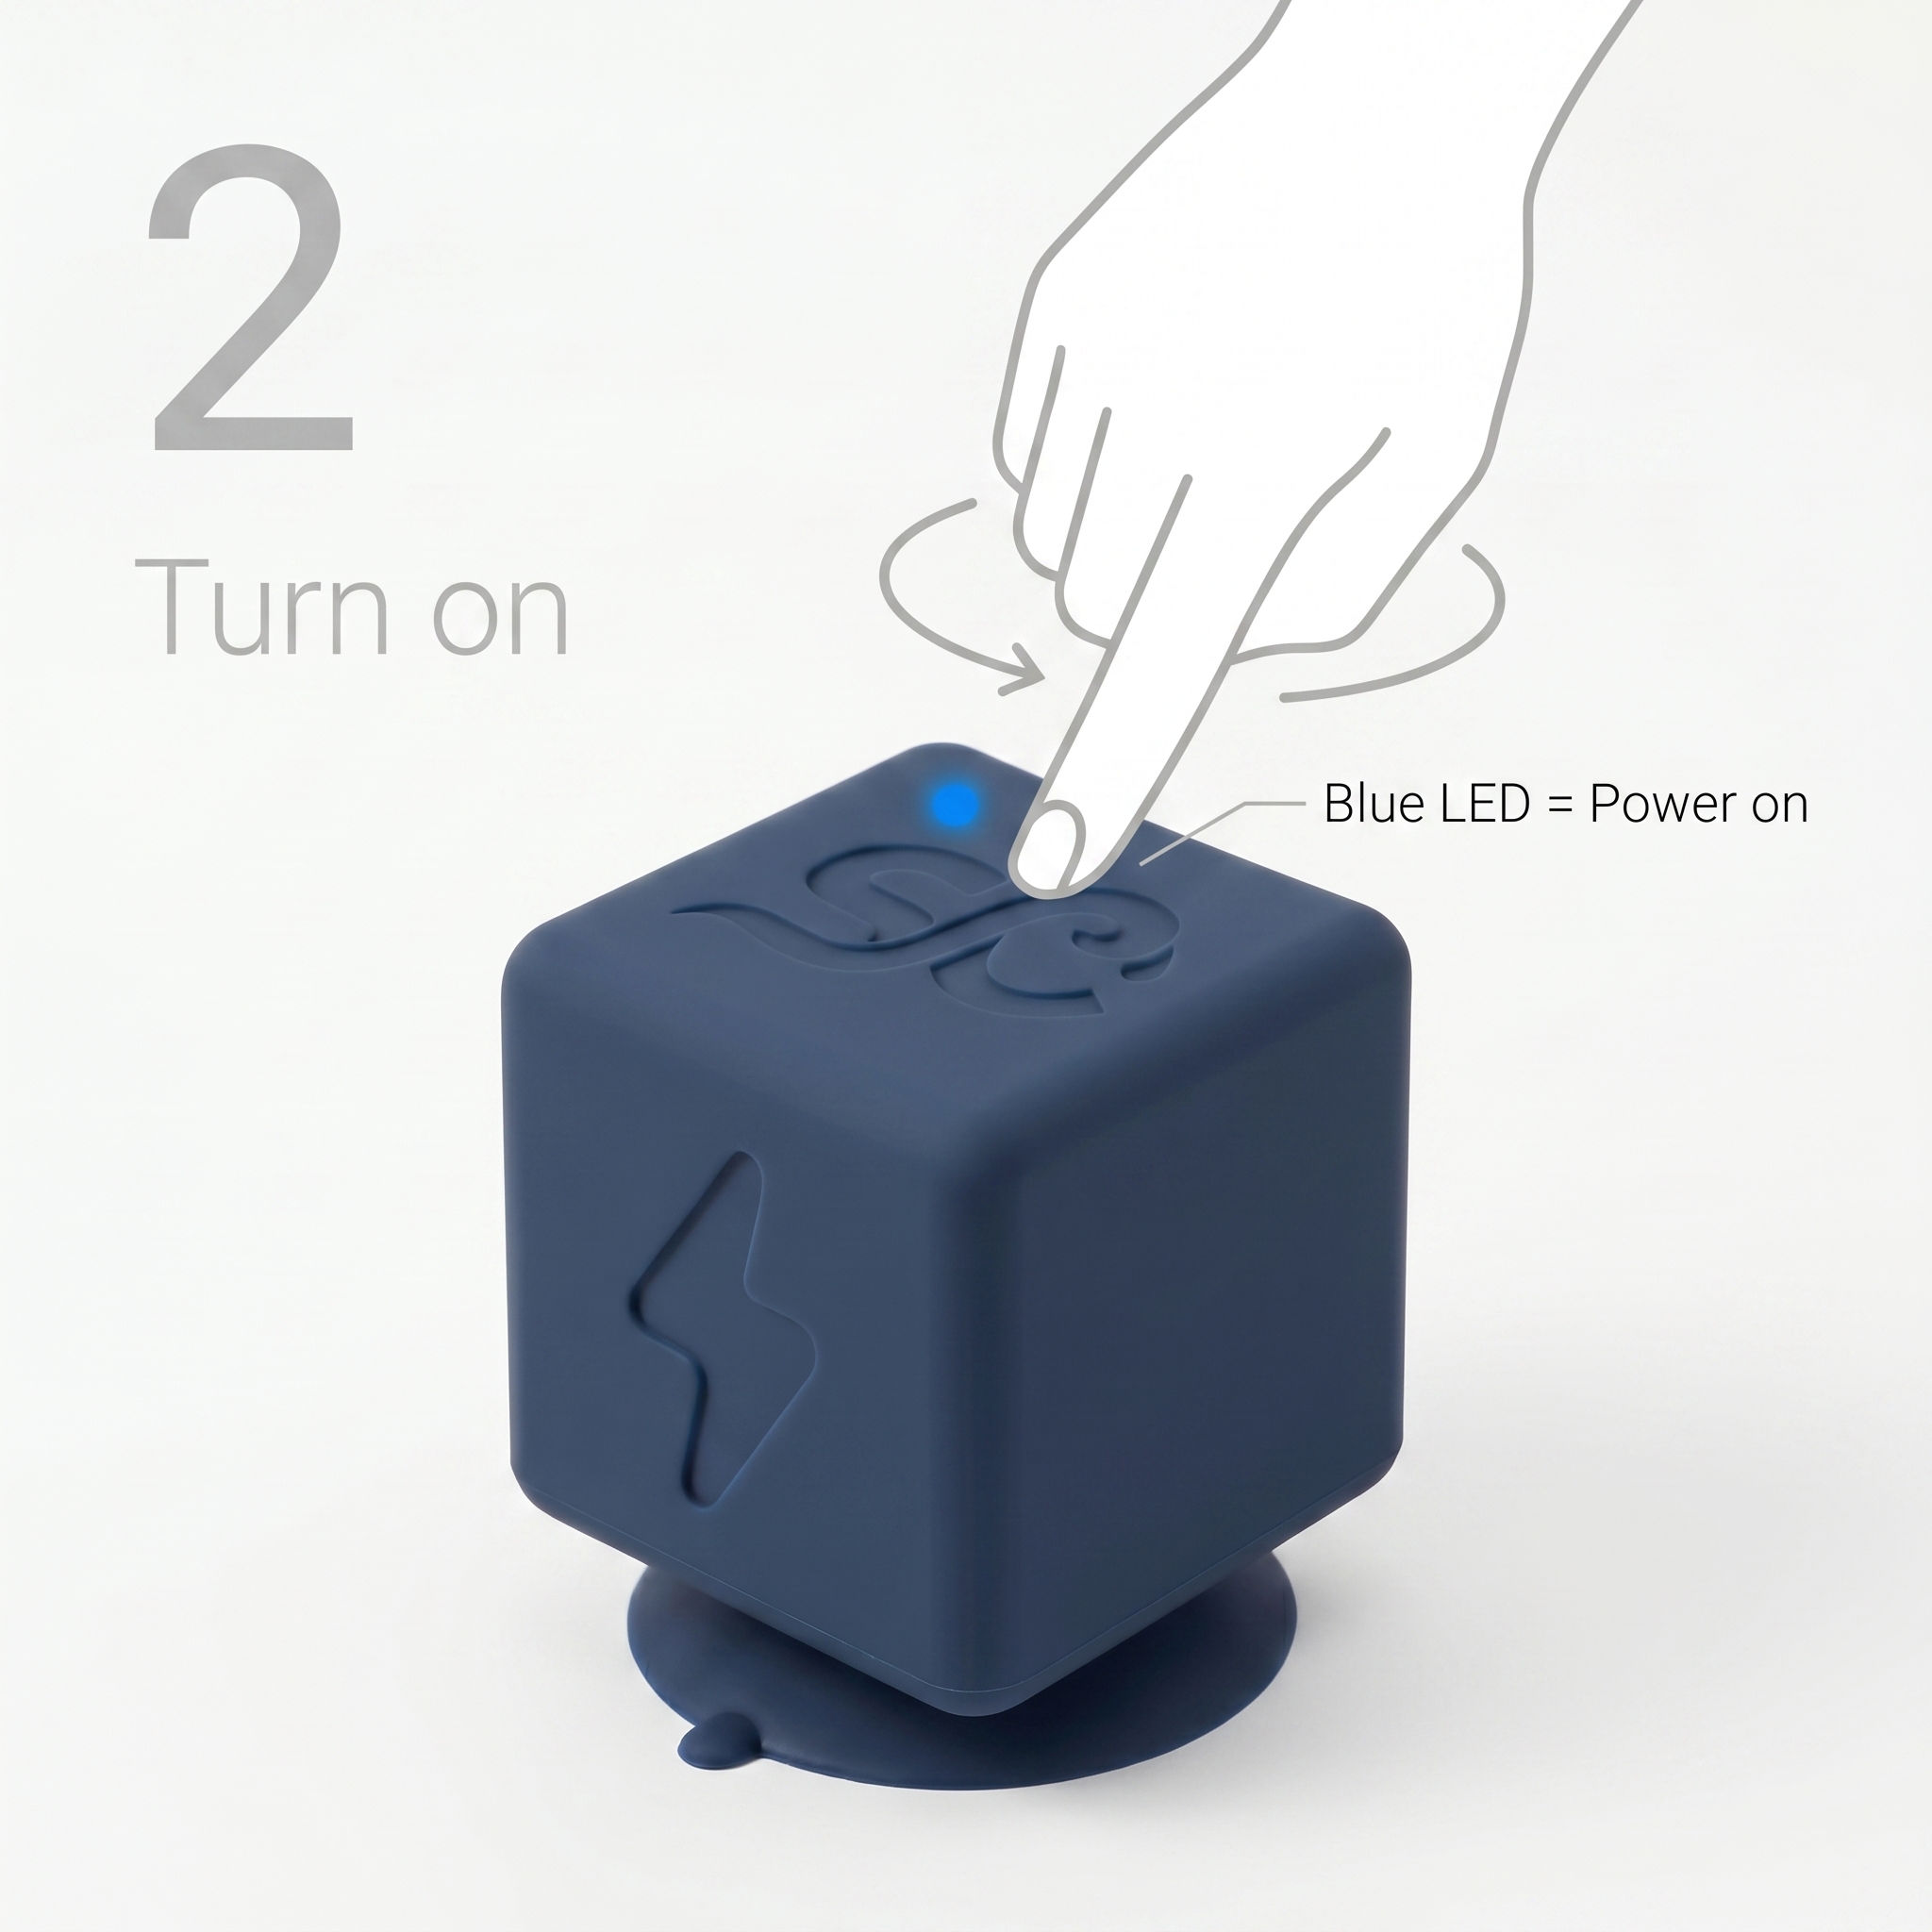
- Turn on — take it off the pad and press the button on top once. A solid blue LED means it's on.
- Download the app — get SipCube from the App Store or Google Play (iOS 15+, Android 8+) and turn on Bluetooth.
- Connect — in the app, open Settings → SipCube Device → Scan and pair within 1 metre.
- Install & calibrate — press it firmly to the bottom of any wide-mouth bottle (50mm or wider inside) with the gripper tool, then calibrate (~30s).
- Drink — that's it. Every sip is tracked automatically and syncs within 3 seconds.

Use the included gripper to press SipCube into your bottle and the grabber to remove it — no reaching inside. Add the extension for taller bottles.
See the full 6-step setup guide →
Part 2
Using the app
Everything you'll do day to day, shown on real app screens.
1
Your daily dashboard
The Home screen shows your progress ring — how much you've had versus your personalized daily goal, how much is left, and how many drinks you've logged today. Your streak and next badge sit right above it.
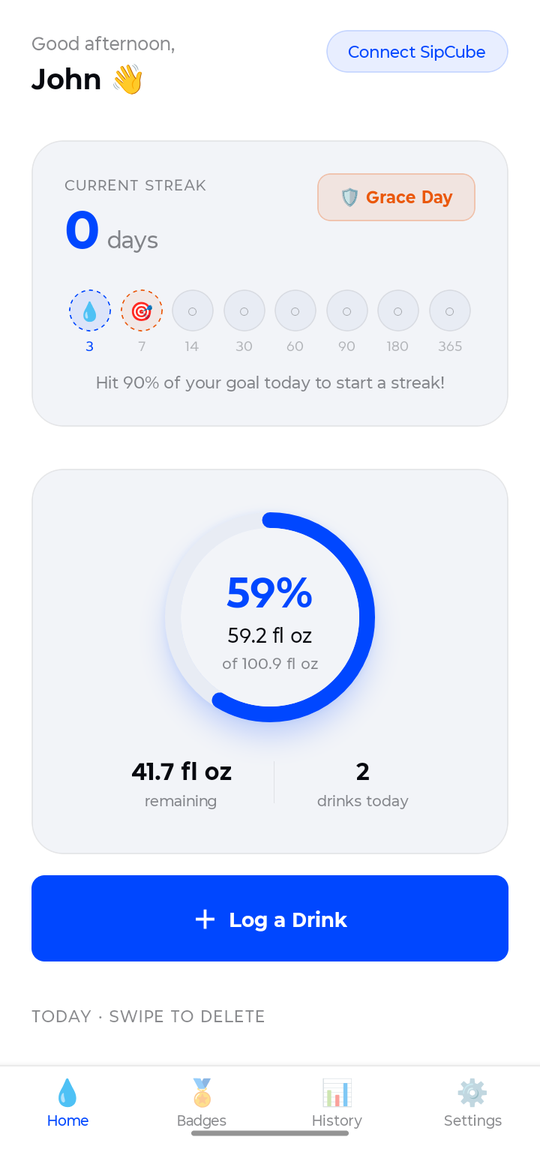
Home — daily progress ring, streak, and drinks logged.
Hit 90% of your goal to keep your streak alive. The ring and remaining amount update in real time as you drink.
2
Log a drink manually
Drinking from a bottle without your SipCube? Tap Log a Drink, pick what you're drinking, choose an amount (or enter a custom one), and toggle Contains Ice if needed. The app credits the right amount of hydration and adds it to your ring.
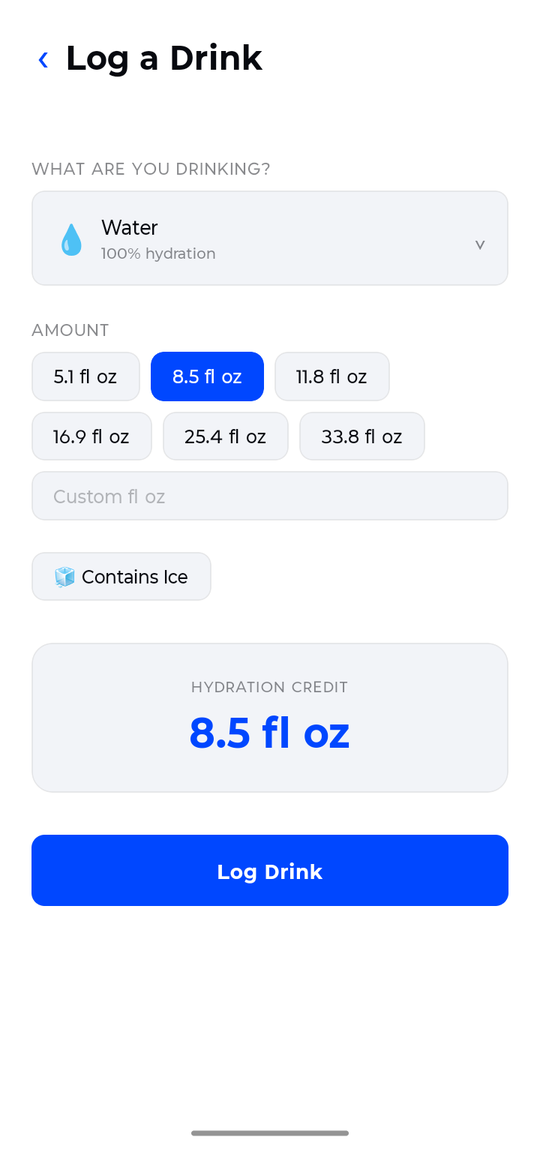
Log a Drink — beverage type, amount, and ice adjustment.
With a paired SipCube in your bottle you rarely need this — every sip is logged automatically. Manual logging is for coffee, juice, or any other cup.
3
Pair your SipCube
Open Settings and scroll to SipCube Device, then tap Scan. Make sure the device is powered on (solid blue LED) and within a metre of your phone. Once paired, sips track automatically and your battery level shows on the Home screen.

Settings → SipCube Device → Scan.
Not finding it? Press the button to wake the device, confirm Bluetooth is on, and keep it close while scanning.
4
History & trends
The History tab shows your month at a glance — days you met your goal, your daily average, and your best streak. Tap through past days to see exactly how much you drank and how close you came to your goal.
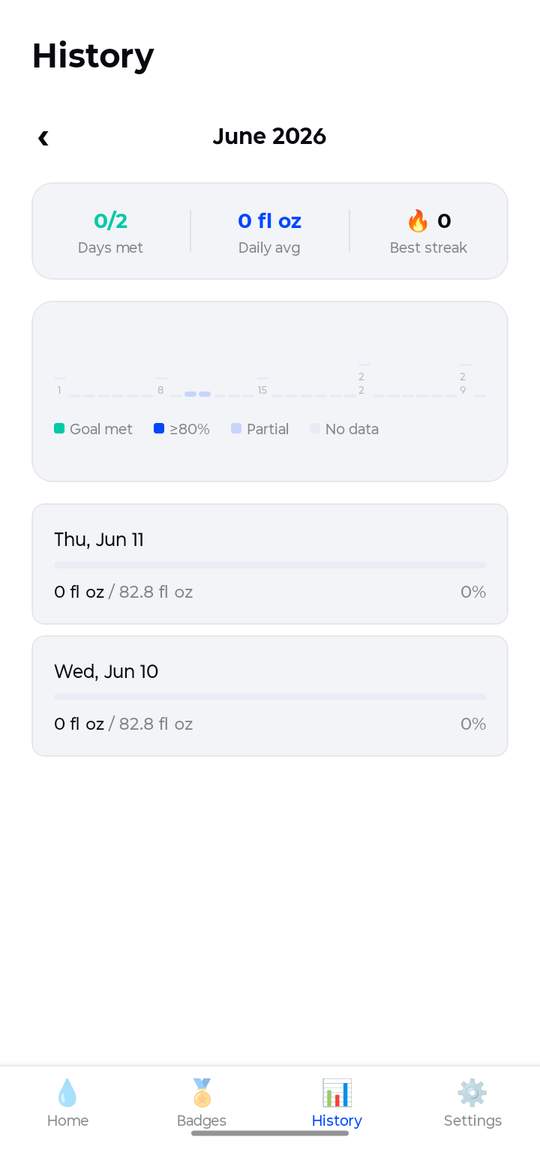
History — monthly overview and daily breakdown.
5
Streak badges
Stay consistent and unlock badges as your streak grows — from Drop (3 days) all the way to Abyss (365 days). The Badges tab shows what you've earned and how many days until the next one.
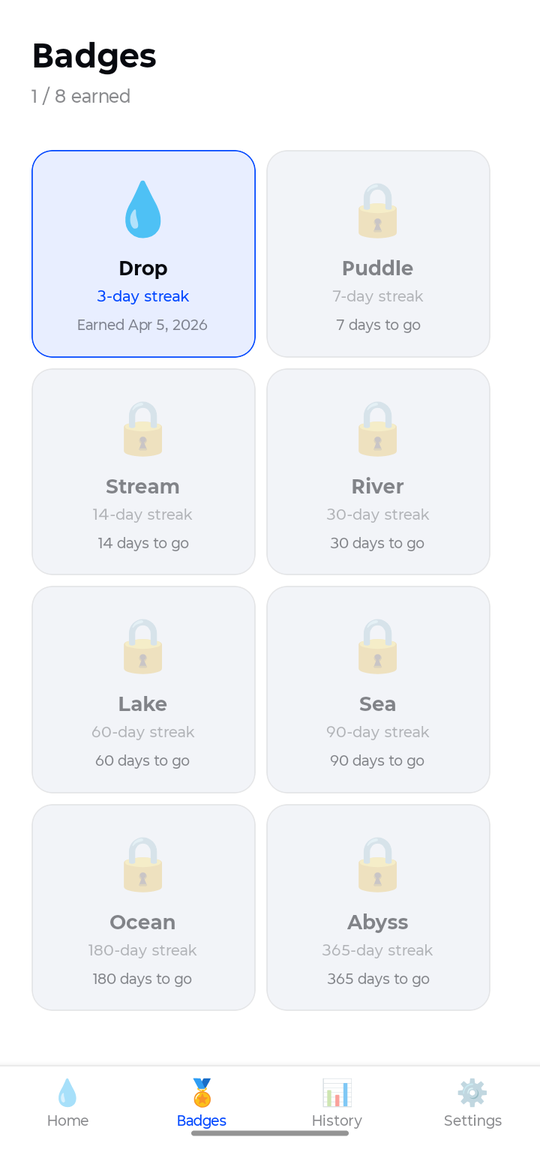
Badges — streak milestones from Drop to Abyss.
LED
LED Guide
The single LED on the top face tells you everything about the device's current state.
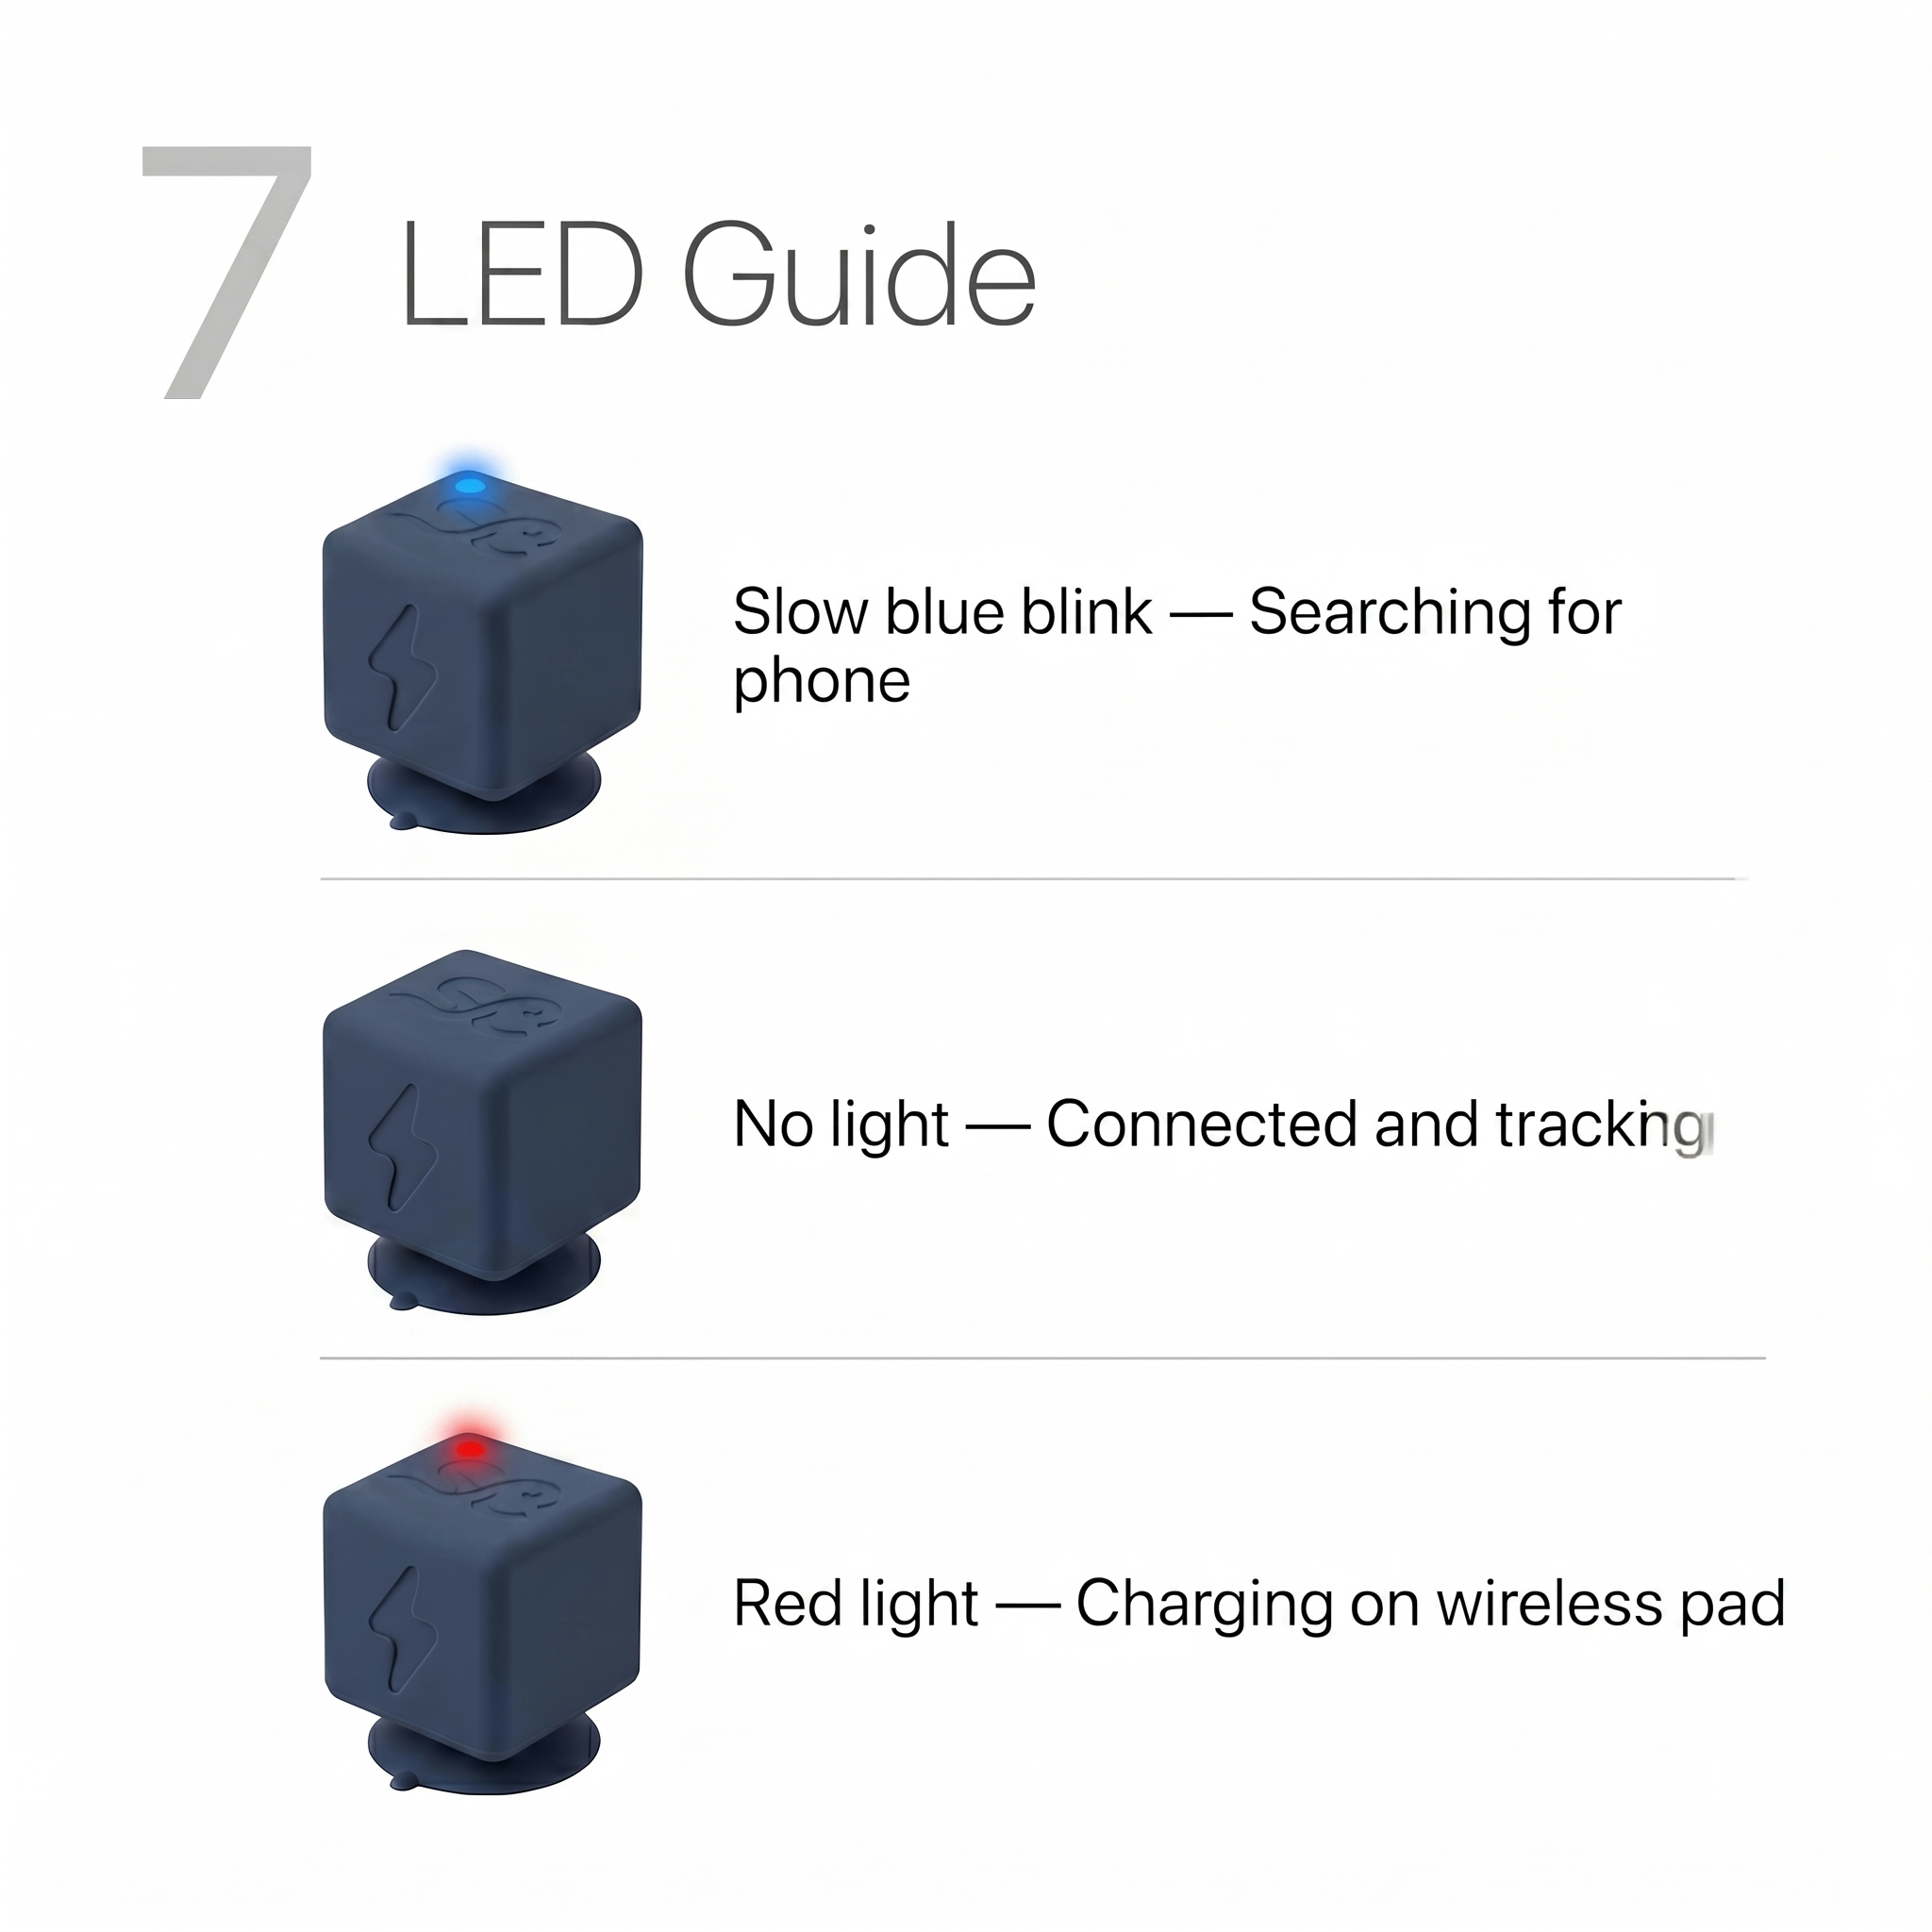
| LED State | Meaning |
|---|---|
| Slow blue blink | Searching for phone — open the app to connect |
| No light | Connected and actively tracking your sips |
| Red light | Charging on the wireless pad |
| Red light off (on pad) | Fully charged — ready to use |
PWR
Power Guide
One button controls everything. Here’s what each press does.
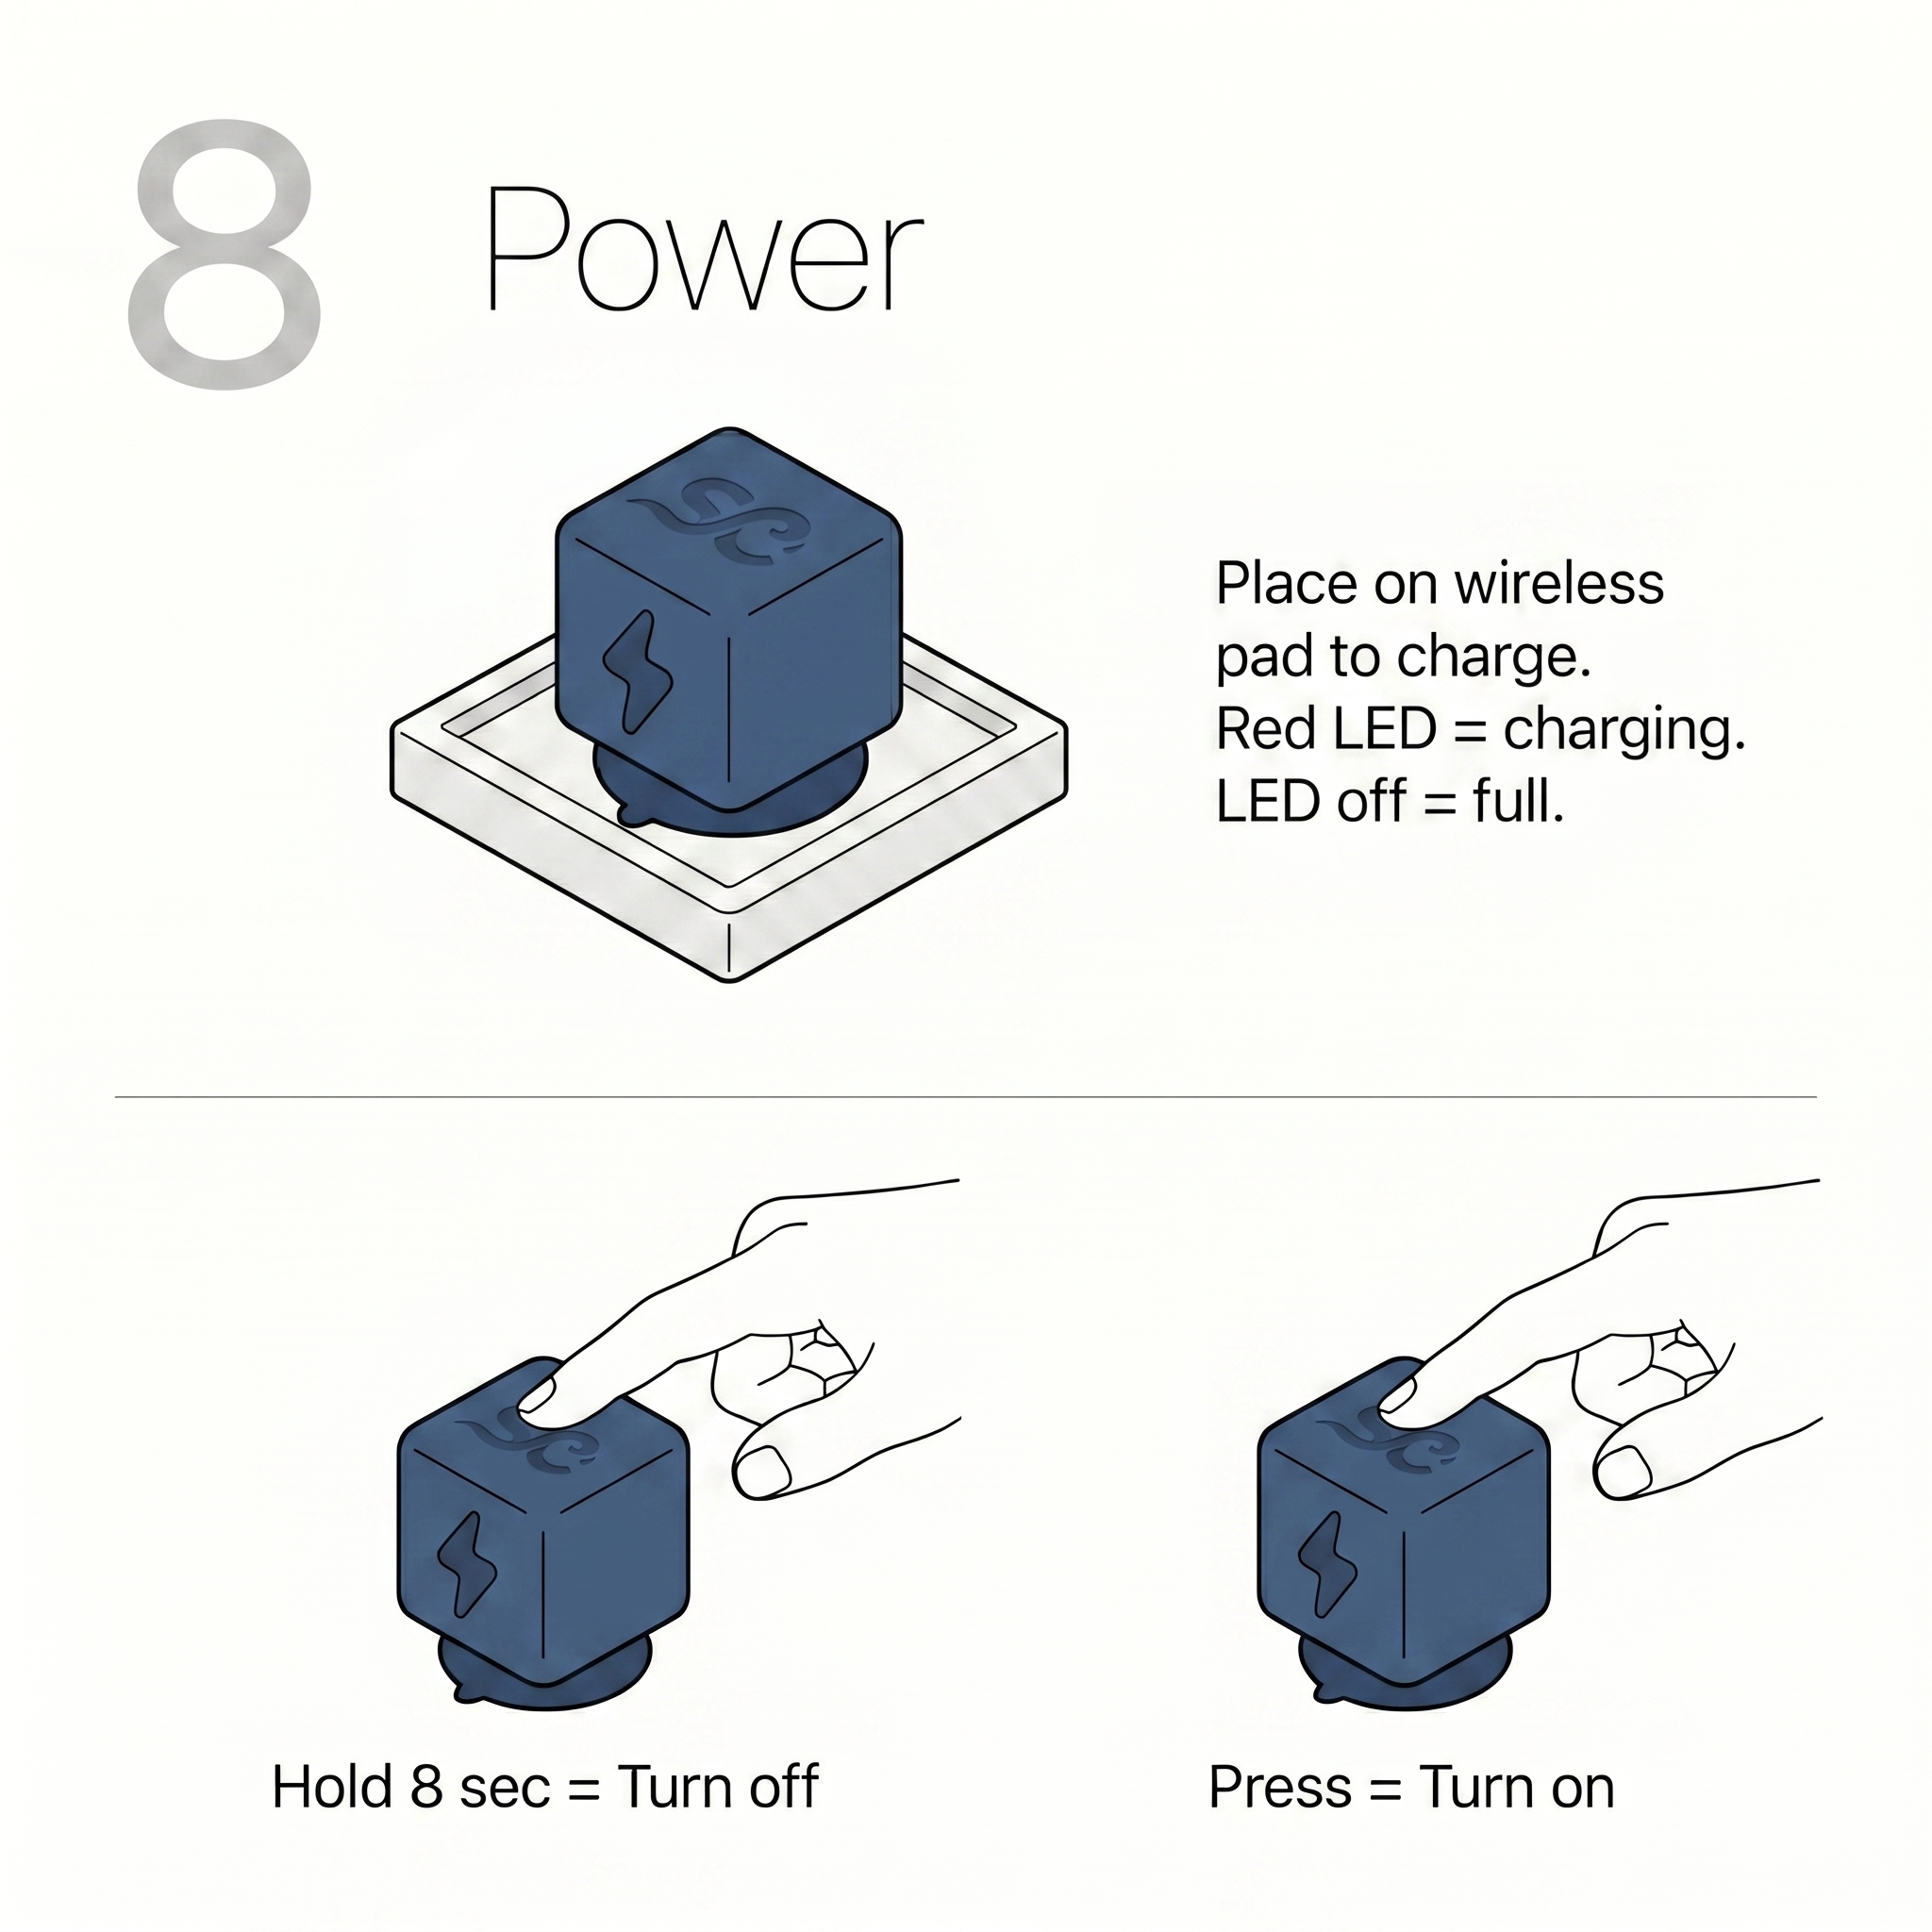
Press once
Turn on. Blue LED confirms the device is powered and searching for your phone.
Hold 8 seconds
Turn off. Hold until the LED flashes twice, then release. SipCube will stop tracking.
Place on pad
Charge wirelessly. Red LED = charging. LED off = full charge. No button press needed.
LED off = full
When charging is complete the red LED turns off automatically. Remove from pad and press once to turn on.